Comindware integration with Data Studio
Data studio is a google service that provides the ability to connect to any data source. Based on them, you can create interactive dashboards and beautiful reports, available both for individual users, teams, and for the whole world.
Data Studio cannot connect directly to CMW Tracker because the product has a graph database instead of a relational one. Most of the existing inbuilt connectors are designed specifically for the relational databases. To still be able to upload data from CMW Tracker templates, you need your own connector. Comindware Connect was created for exactly this purpose. In this article, you will learn how to set up data transfer from CMW Tracker to Data Studio using this connector. All settings will be made in Data Studio.
1. Go to the Data Studio website.
2. If you are visiting the Data Studio website for the first time, click the "USE IT FOR FREE" button to access the site's features.
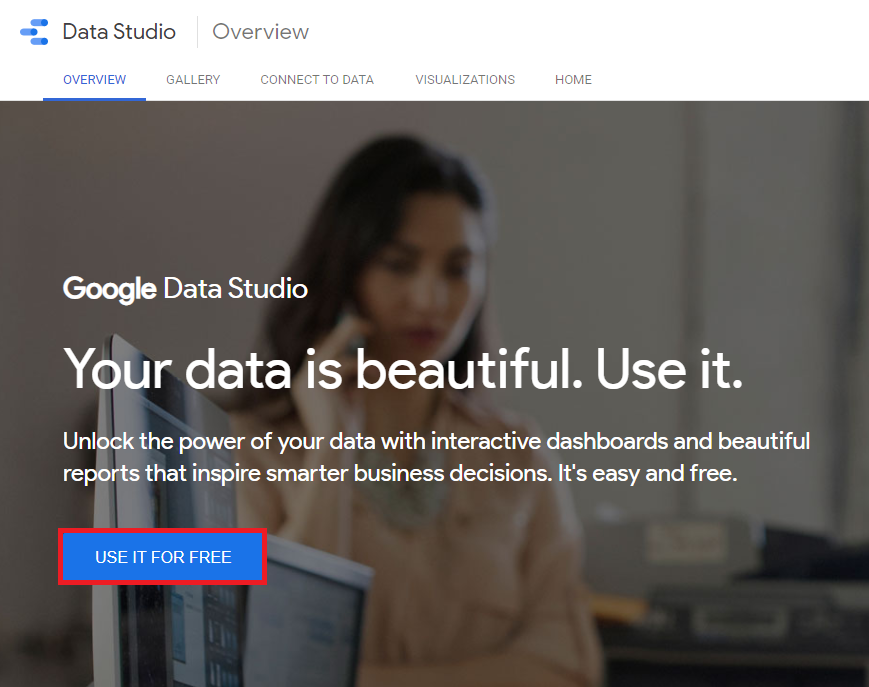
Data Studio welcome screen
3. Sign in to your Google account or create a new one.
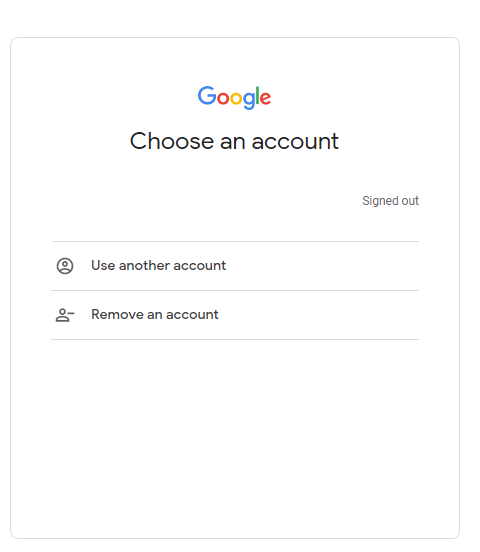
Google authorization window
4. After successful authorization, you will be taken to the main Data Studio desktop.
5. Click on the "Create" button and select "Data Source" to create a new connection.
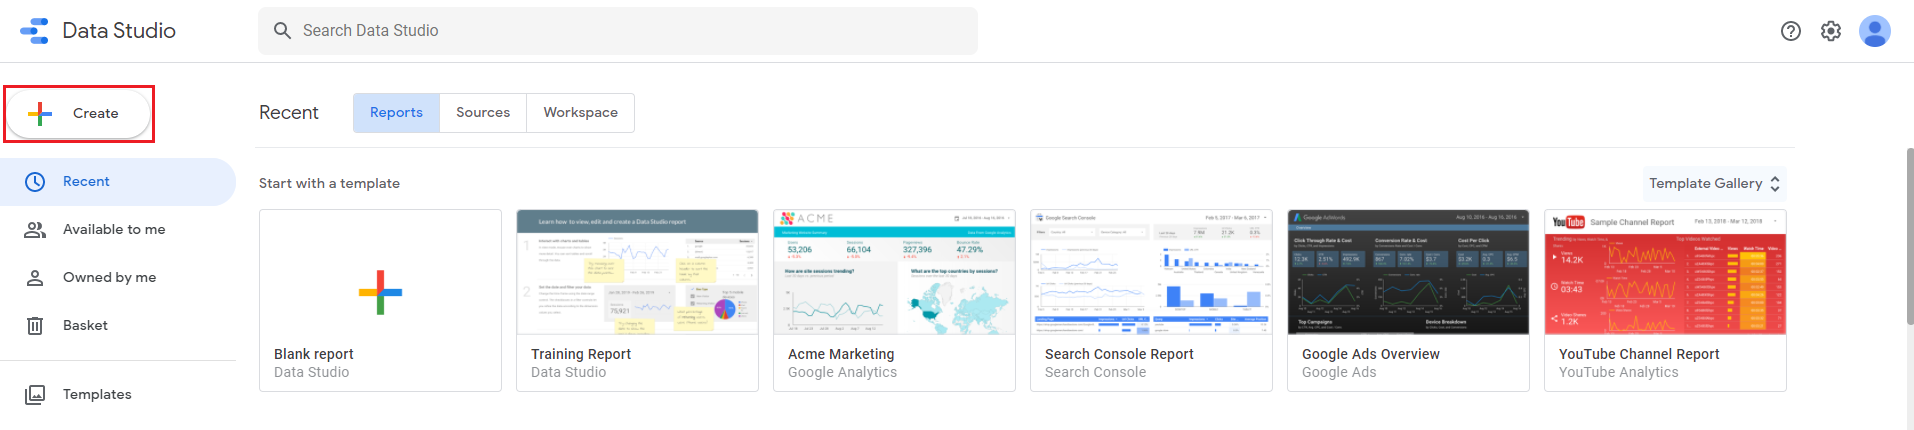
"Create" button
6. Search for "Comindware Connect" and click on it.
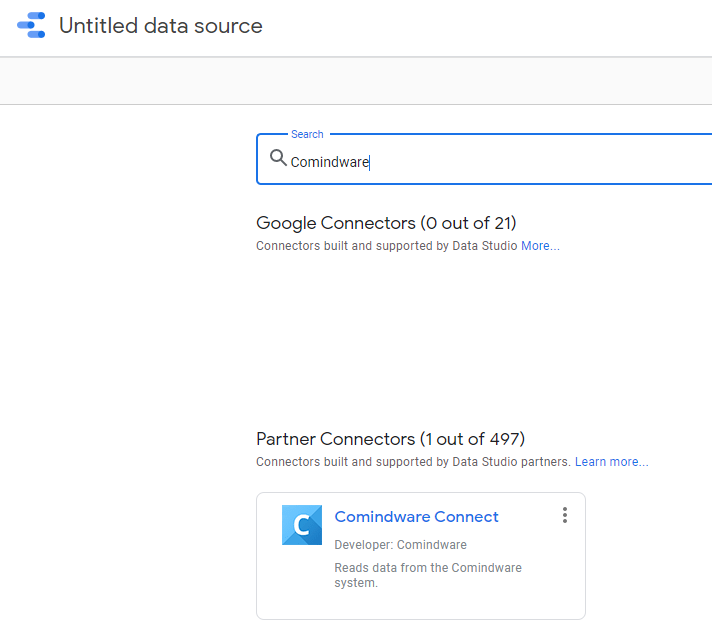
Selecting data source
7. Allow Data Studio to authorize for the initial connection to the connector.

Authorization to the connector
8. Select your Google account.
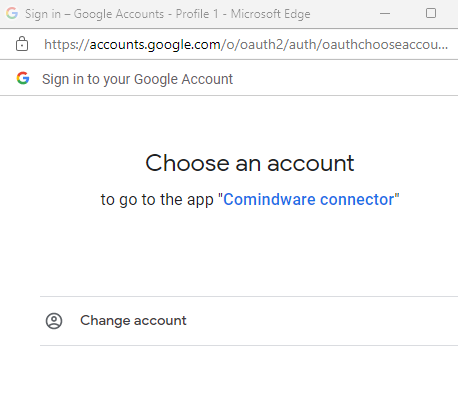
Google authorization window
9. Click “Allow” to connect to CMW Tracker.
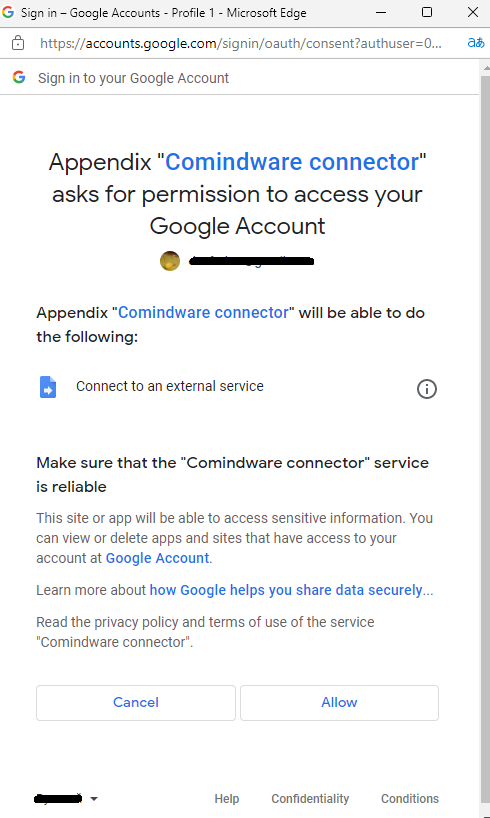
Allowing connection to CMW Tracker
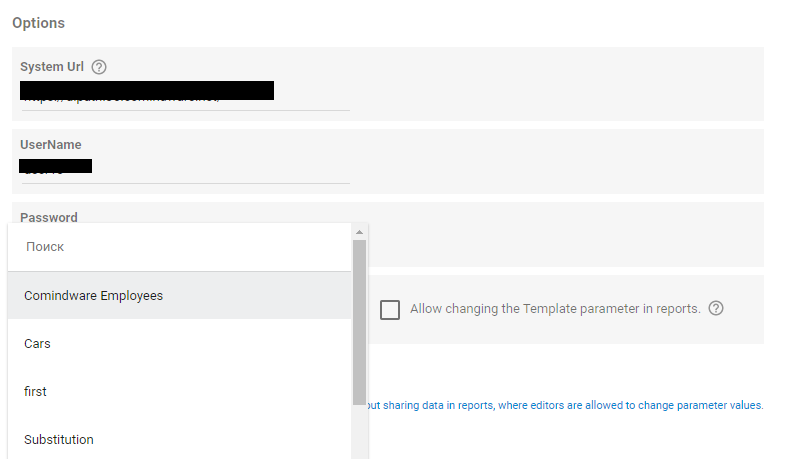
10. In the form that opens up, enter the required data:
- System Url — system address (example: https://myinstance/);
- UserName — the login of the user in CMW Tracker system that has access to the uploaded data;
- Password — the password of the user in CMW Tracker system that has access to the uploaded data.
11. Click the “NEXT” button.
12. A field will appear showing all available apps. Select an app with the data you need to upload.
List of the available templates
13. After selecting an app, click the "LINK" button in the upper right panel.
14. Process the received data if necessary and click the "CREATE REPORT" button.
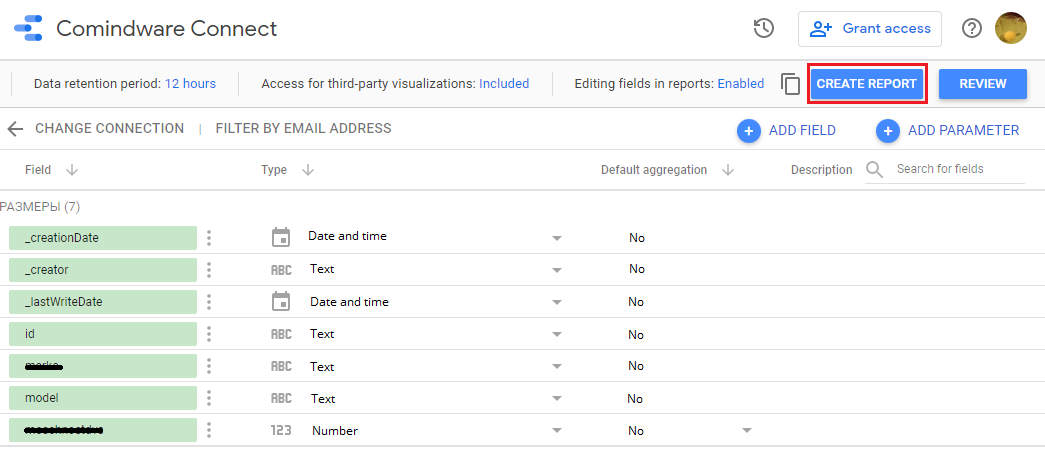
Preparing data for creating a report
If the connection is successful, you will be redirected to the report designer page.