Lesson 9 — Document Generation
Table of Contents
Introduction
In this lesson, you will learn how to generate a PDF report from the business process data using a Microsoft Excel template.
Estimated time to complete: 15 min
Prerequisite: complete Lesson 6 — Advanced Process
Note: This lesson is for the CMW Platform version 4.2.571.0. In other versions, the page and menu appearance may differ from the screenshots.
Generate Cost Report
Business Requirement
After completing the trip, the Driver needs to download a PDF report detailing the expenses they filed.
Let's configure the cost report generation on a button click in the Complete the trip user task.
To export a record as a formatted document, you need to:
- Create an Excel or Word file with data placeholders and arbitrary static content.
- Configure an export template using your Excel or Word template file.
- Configure a button to generate the document filled with the exported data.
- Click the button to download the generated document.
Configure Excel Template File
Let's configure an Excel file with placeholders for the export template.
1. Create an Excel file (in XLSX format).
2. Fill in the Excel sheet as shown in the figure below:
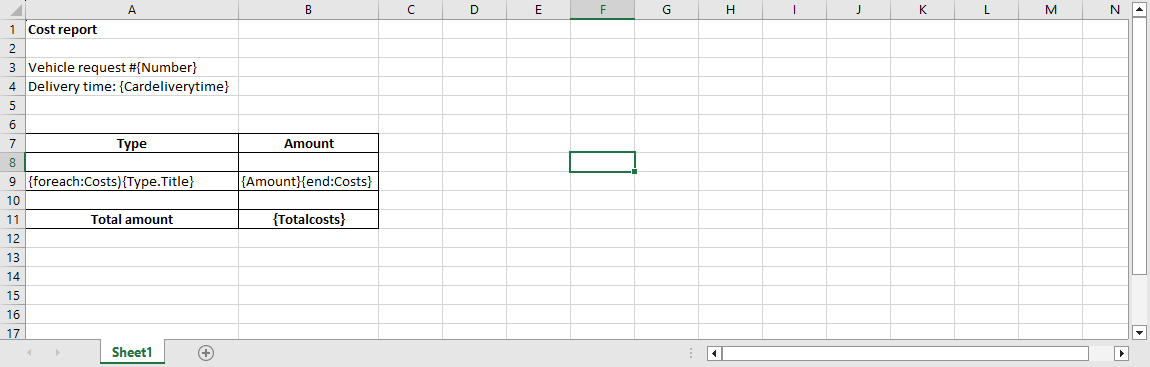
Cost report Excel template file
Export Template File Syntax
The export template replaces placeholders in an Excel or Word file with the exported data. The rest of the template file content remains intact during the export.
The export template file may contain arbitrary content and placeholders to hold the exported data. You can export single attribute values and datasets.
This way, you can create a sophisticated layout, e.g., an invoice, and fill it with the exported data.
- To export an attribute value, enter its system name in curly brackets:
{systemname} - To export a linked template attribute value, enter its system name after the record attribute system name separated by a full stop:
{RecordAttribute.LinkedTemplateAttribute} - To export a dataset from a record template linked to a multivalue record attribute, use the
foreachand end statements:{foreach:MultiValueRecordAttribute} {RecordAttribute.LinkedTemplateAttribute1} {LinkedTemplateAttribute2} {end:MultiValueRecordAttribute}- A table row with the
foreach andendstatements is converted to several rows — a row per linked record. - In the first column, enter the
foreach:operator and the record attribute system name (no spaces allowed): {foreach:MultiValueRecordAttribute} - In the last column, enter the
end:operator and the record attribute system name (no spaces allowed): {end:MultiValueRecordAttribute} - Between the
foreachandendstatements, enter the linked template attribute system names in curly braces: {LinkedTemplateAttribute}.
- A table row with the
To export data from the Vehicle request record template, enter attribute system names in curly brackets:
{Totalcosts}— the total amount of costs.{Number}— the request number.{Cardeliverytime}— car delivery time.
To export the cost records linked to a vehicle request, enter the following:
{foreach:Costs} {Type.Title} {Amount} {end:Costs}
Costs— the multivalue record attribute in the Vehicle requests record template linked to the Costs record template.Amount— the attribute in the Costs record template.Type— the record attribute in the Costs record template linked to the Cost types record template.Title— the attribute in the Cost types record template.
Configure Export Template
1. In the Vehicle requests record template, go to the Export templates tab.
2. Click Create.
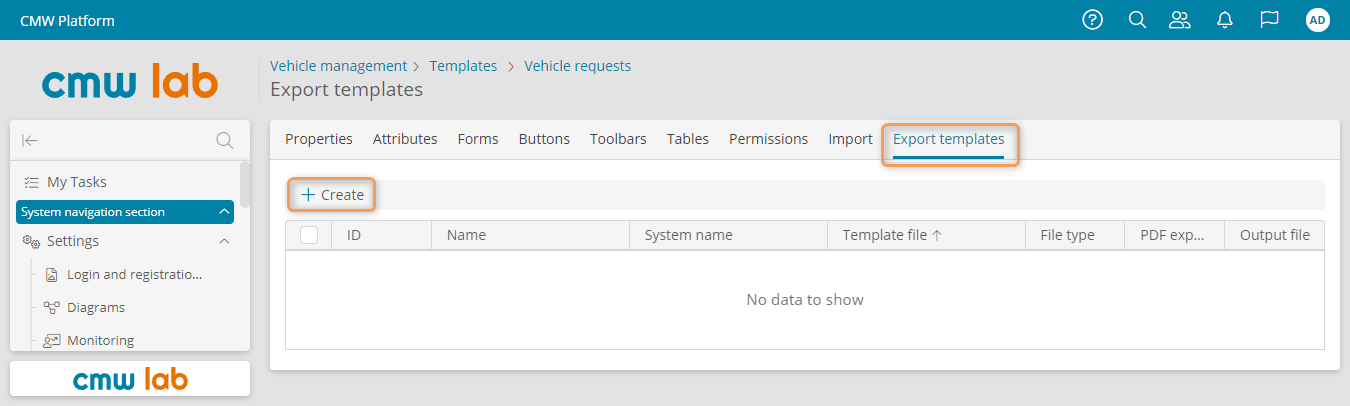
Creating an export template
3. The New export template window appears.
4. Specify the export template name — Cost report.
5. In the Template file field, select Value and upload the XLSX template file you created earlier.
6. In the Output file name field, select Value and specify the required name of the exported data file without the file extension — Cost report.
7. Check the Export as PDF checkbox.
8. Click Save.
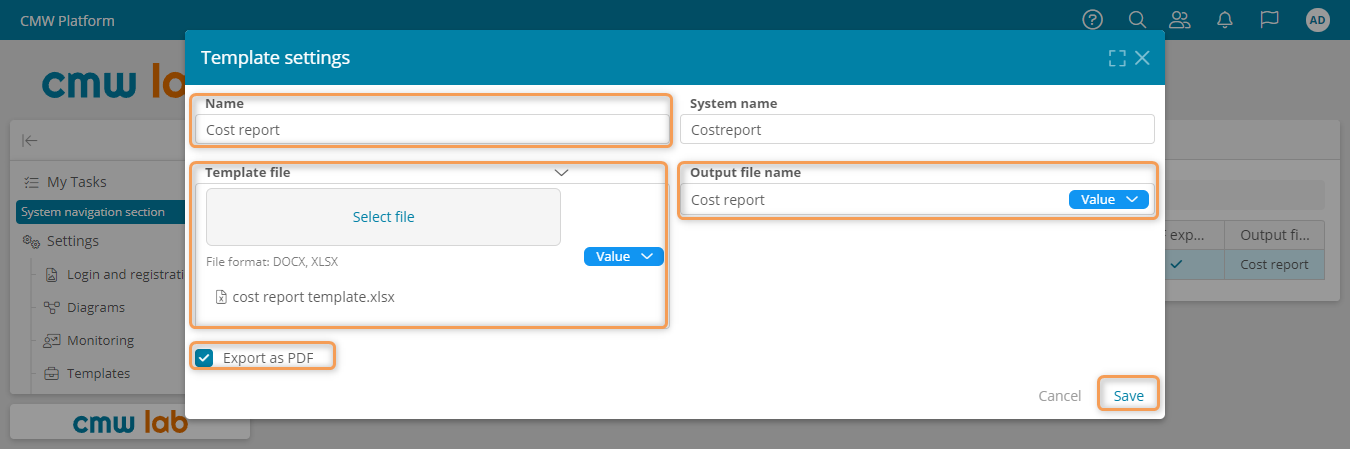
Configuring an export template
Configure Export Button
When you create an export template, a corresponding button to download the exported document is automatically created.
Let's verify the export button properties and add the button to the user task form.
Verify Export Button Properties
1. In the Vehicle requests record template, go to the Buttons tab.
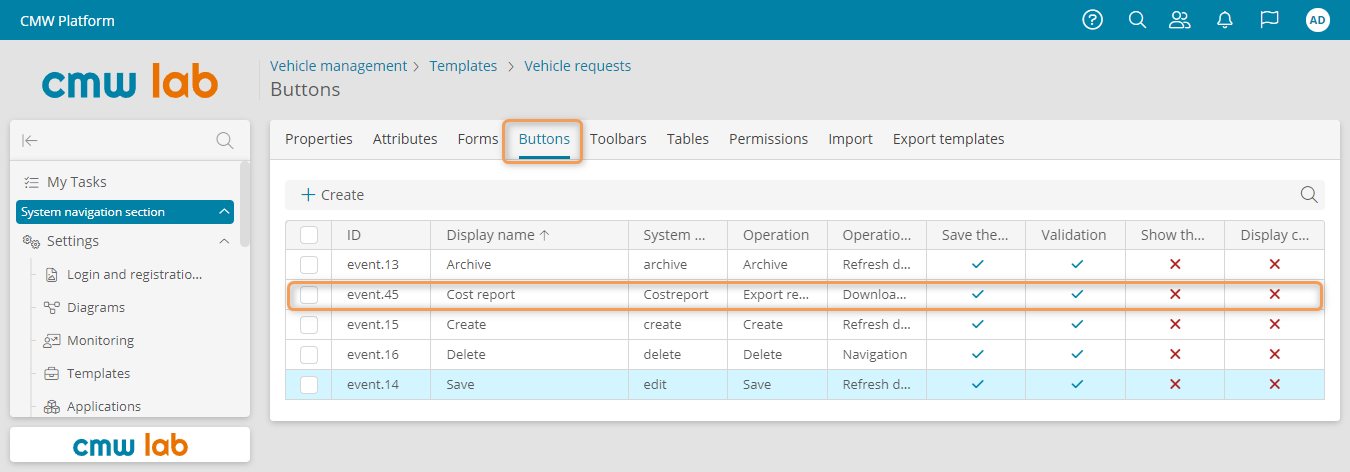
The list of buttons in the record template
2. Open the Cost report button by double-clicking on it. Check that its properties are correct:
- Display name: Cost report
- Operation context: Record
- Operation: Export record
- Operation result: Download document
- Export template: Cost report
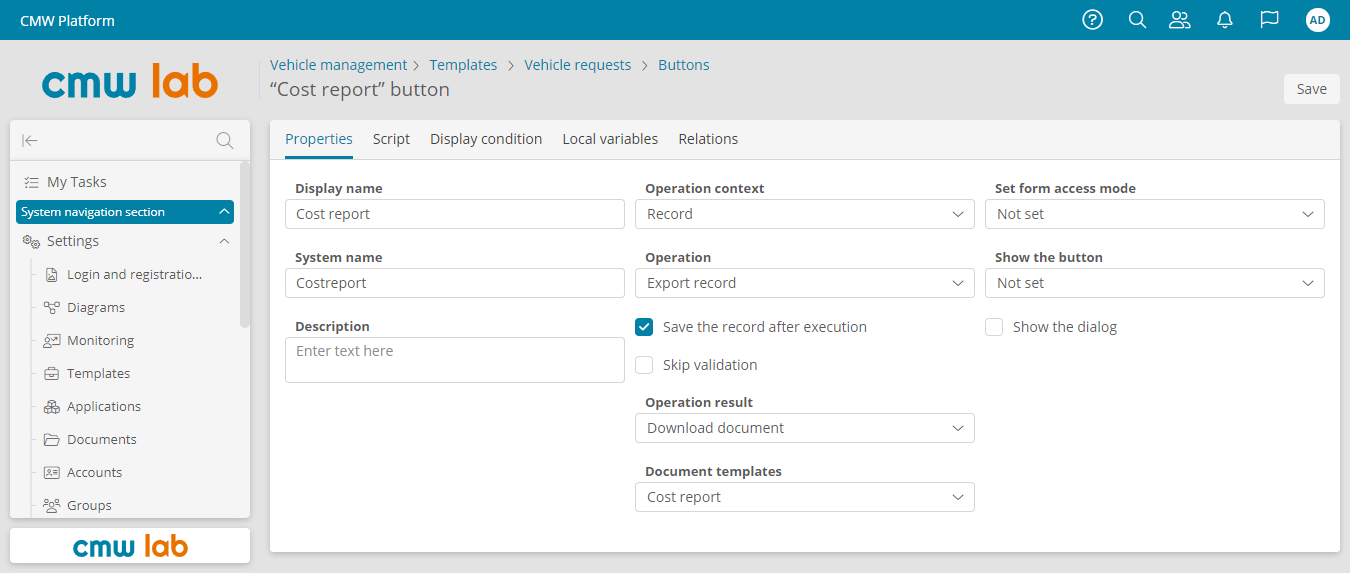
The Cost report button properties
Add Export Button to the User Task Form
Let's add the Cost report button to the Complete the trip user task form:
- Create the Report download form with only the Cost report button.
- Place the Report download form on the Complete the trip user task form.
1. Open the Vehicle requests record template and go to the Forms tab.
2. Click Create.
3. Rename the form to Report download.
4. Rename the default area to Report download.
5. Select the toolbar in the Report download area and drag the Cost report button to the toolbar.
6. Save the form.
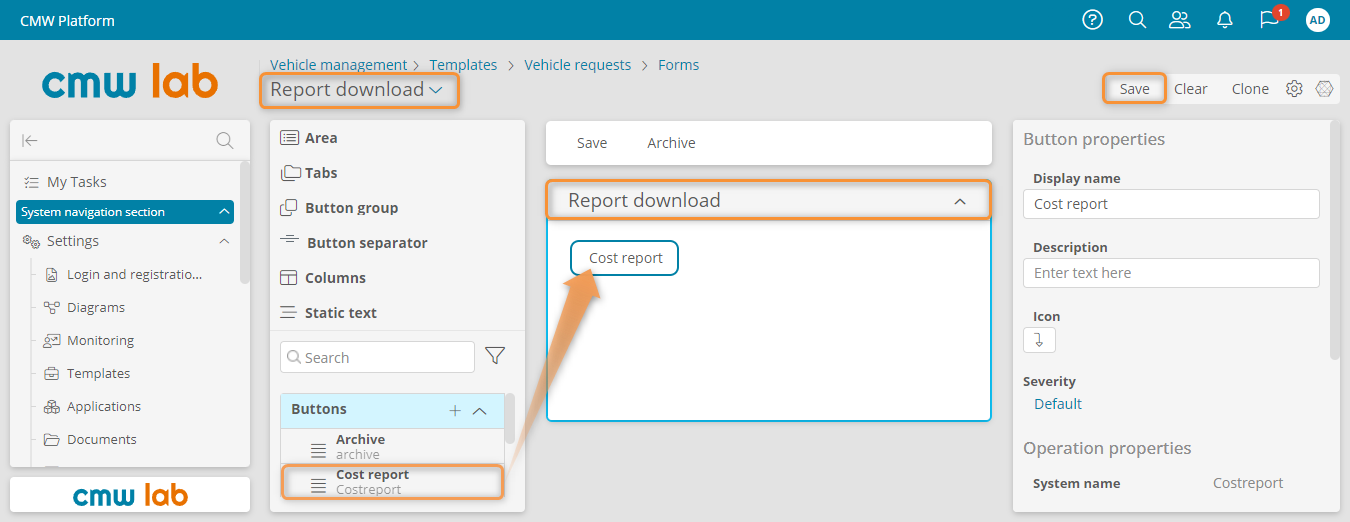
Adding a button to the form
7. In the Ordering a corporate vehicle process template, go to the Diagram tab and click Edit.
8. Select the Complete the trip user task and click Form in the element menu.
9. Expand the Vehicle requests template in the element pane and drag the Report download form below the Complete the trip area.
10. Save the form.
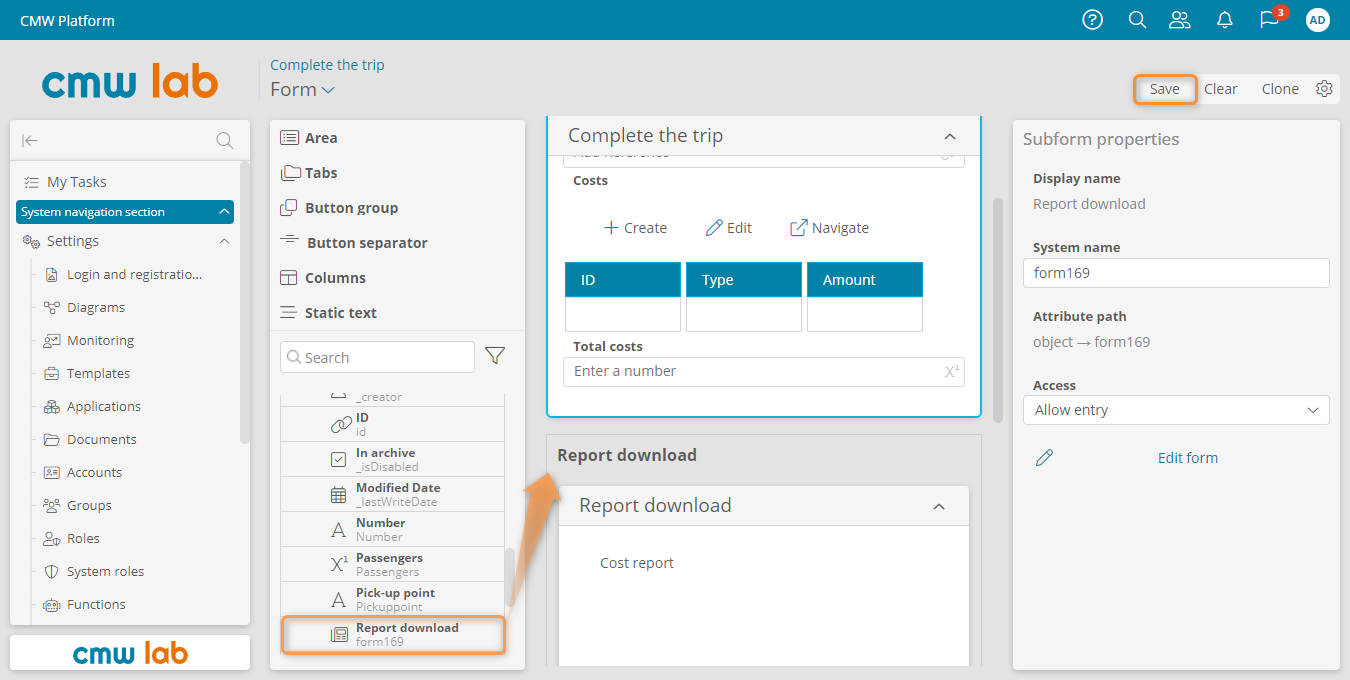
Adding the Report download subform to the Complete the trip user task form
5. Publish the Ordering a corporate vehicle process diagram.
Configure Export Button Display Condition
To use the Cost report button, the Driver needs the appropriate permission in the Driver role.
1. In the Vehicle management application, go to Roles.
2. Open the Driver role and go to the Permissions tab.
3. Expand the Vehicle request record template in the resources pane and drag the Cost report button to the resource permissions table.
4. Select the Use buttons checkbox for the Cost report button.
5. Save the role.
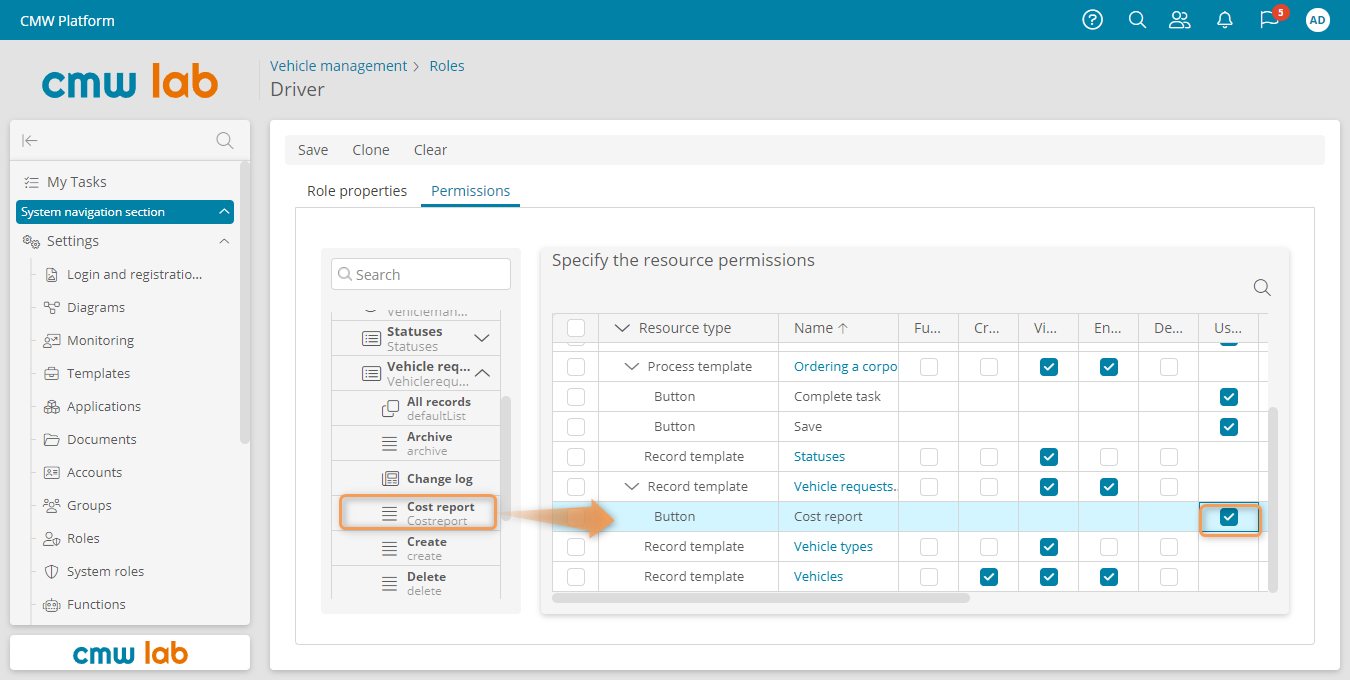
Adding the permission to use a button in the Driver role
Test the Cost Report Export
Note
If you completed Lesson 8 — Accounts, the user tasks are assigned to different accounts.
To go through the business process, you can perform user tasks in one of the three ways:
- Log in several times with different accounts: Initiator, Secretary, Driver, Garage manager.
- Order a vehicle, open the running process instance diagram, and go through the tasks using the Navigate button in the Tokens panel.
- Set your account as the performer of all user tasks.
1. Submit a new vehicle request using the instance list of the Ordering a corporate vehicle process template.
2. Go through the business process up to the Complete the trip task using My tasks.
3. Open the Complete the trip task and add some costs to the table.
4. Click Save.
5. Click Cost report and wait for the generated PDF document to download.
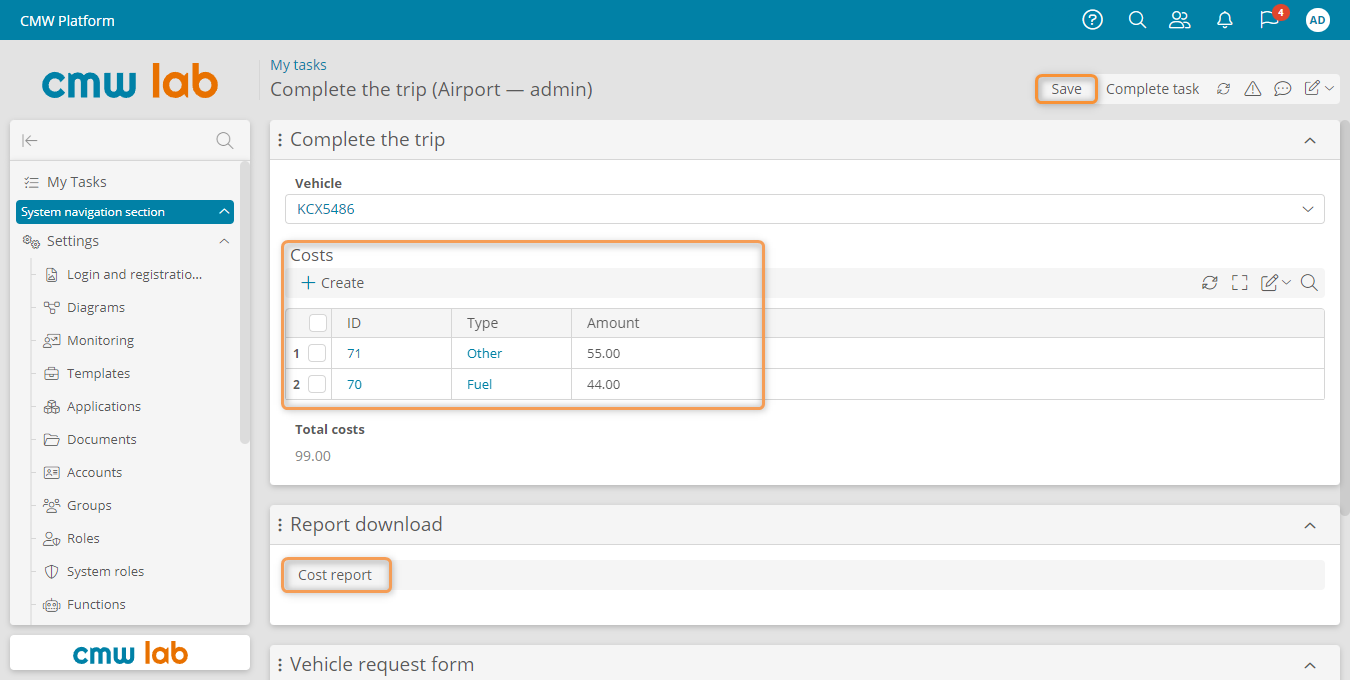
Downloading the cost report from the Complete the trip task
6. Open the exported document.
7. Complete the task.
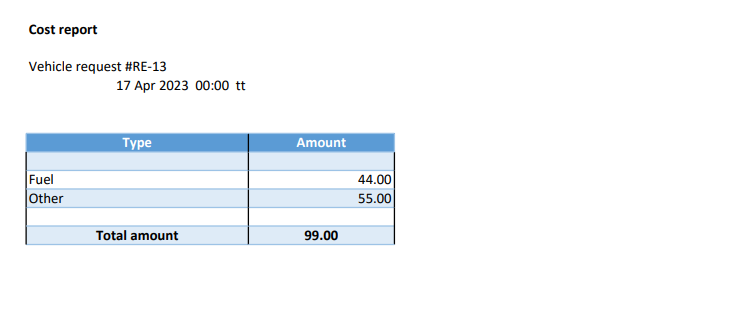
The exported PDF document
Results
Congrats! You have learned how to automatically generate and export documents based on templates, substituting data from a business application.
Proceed to Lesson 10 — Working with Files to learn how to work with the files.