Lesson 1 — Getting Started
Table of Contents
Introduction
In this lesson, you will learn basic CMW Platform concepts and how to log in and configure your account.
To get started, you will need access to the CMW Platform. If your organization is a CMW Lab customer, you can get the URL of a new CMW Platform instance from your system administrator. If you want to get acquainted with the CMW Platform, submit the inquiry form on our website.
The CMW Platform is a web-based business process management system. You can use it from a web browser or the CMW Mobile app.
The following web browsers are supported: Google Chrome, Firefox, Microsoft Edge, and Safari. We recommend updating your browser to the latest version to ensure all CMW Platform features are available.
Estimated time to complete: 10 min
Prerequisite: get access to the CMW Platform instance
Note: This lesson is for the CMW Platform version 4.2.571.0. In other versions, the page and menu appearance may differ from the screenshots.
Definitions
Product — the CMW Platform software.
Instance — a deployed CMW Platform website.
System — a complete hardware and software environment powered by the CMW Platform.
Log in to the CMW Platform
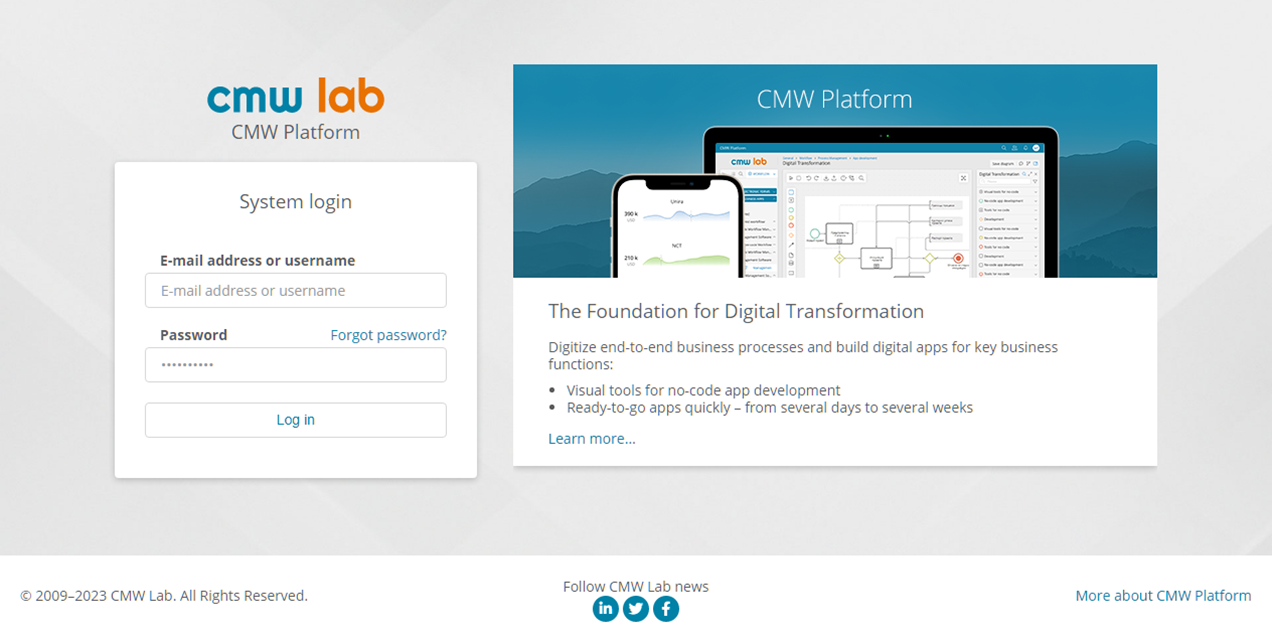
1. Launch your browser and enter the URL of the CMW Platform (deployed on your company's premises or in the CMW Lab cloud if you requested a demo).
2. The login page should appear.
3. Enter the username and password provided by your system administrator or the CMW Lab support.
4. Click Log in.

CMW Platform login page
Configure Your Account
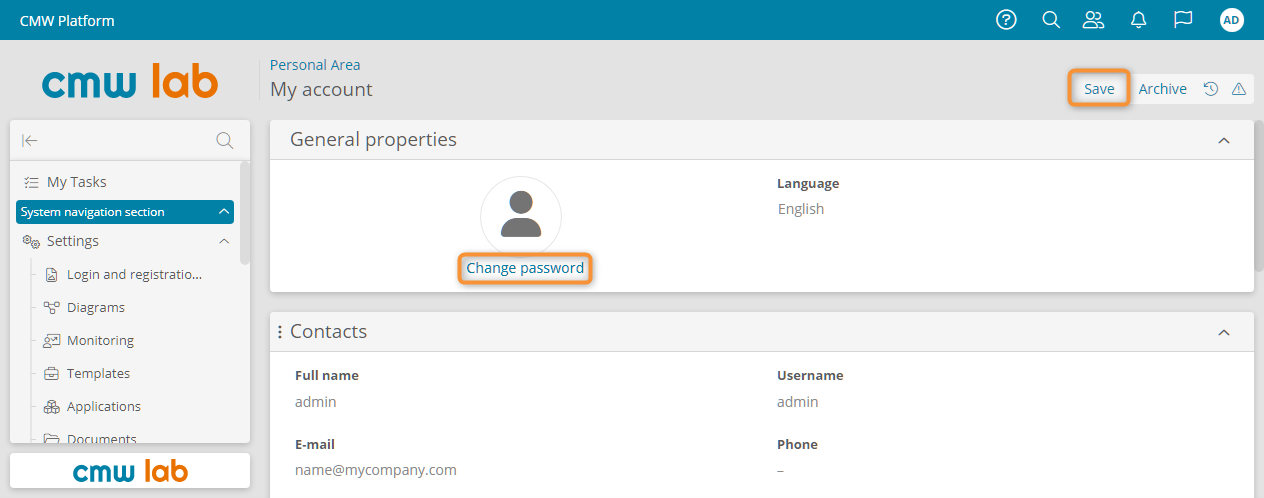
Use My account page to view or edit your personal information and change your password.
Note
Some or all actions on My account page may be unavailable depending on your permissions (granted by the system administrator).
1. Click the icon with your initials in the upper right corner of the screen.
2. Select My account in the dropdown.

Navigating to My account page
3. My account page appears.
3. To reset your password, click Change password.
4. To save your changes, click Save.

My account — view and edit your account details or change your password
Results
Congrats! You have learned how to log in to the system and configure your account.
Proceed to Lesson 2 — My First Data Registry to create your first business application and data registry.
