Lesson 4 — Monitoring and analytics
Table of Contents
Introduction
In this lesson, you will learn how to view process execution history and create dashboards with statistical charts for a specific period.
Estimated time to complete: 10 min
Precondition: complete Lesson 3 — My First Business Process
Note: This lesson is for the CMW Platform version 4.2.571.0. In other versions, the page and menu appearance may differ from the screenshots.
Definitions
Process Instance History
The CMW Platform allows you to inspect the status and execution path of the running and completed business process instances. The following process history information is available:
- Current process stage — token positions on the process diagram.
- Process execution path.
- Event chain for each process diagram element.
- Information about each step (task performer, due date, etc.)
- Errors that occurred while executing the process.
Process Tokens
Token is a BPMN concept: it refers to the current process execution point that moves along the process diagram. A business process can have several tokens, each following a separate path.
Inspect the Business Process Execution
Let's look at the history of a vehicle booking process instance.
1. Go to the template list and open the Ordering a corporate vehicle process template by double-clicking it.
2. Open the process instance list by clicking Navigate to instances on the Properties tab.
3. Select a running process instance by double-clicking its row or clicking its ID link.

List of process instances
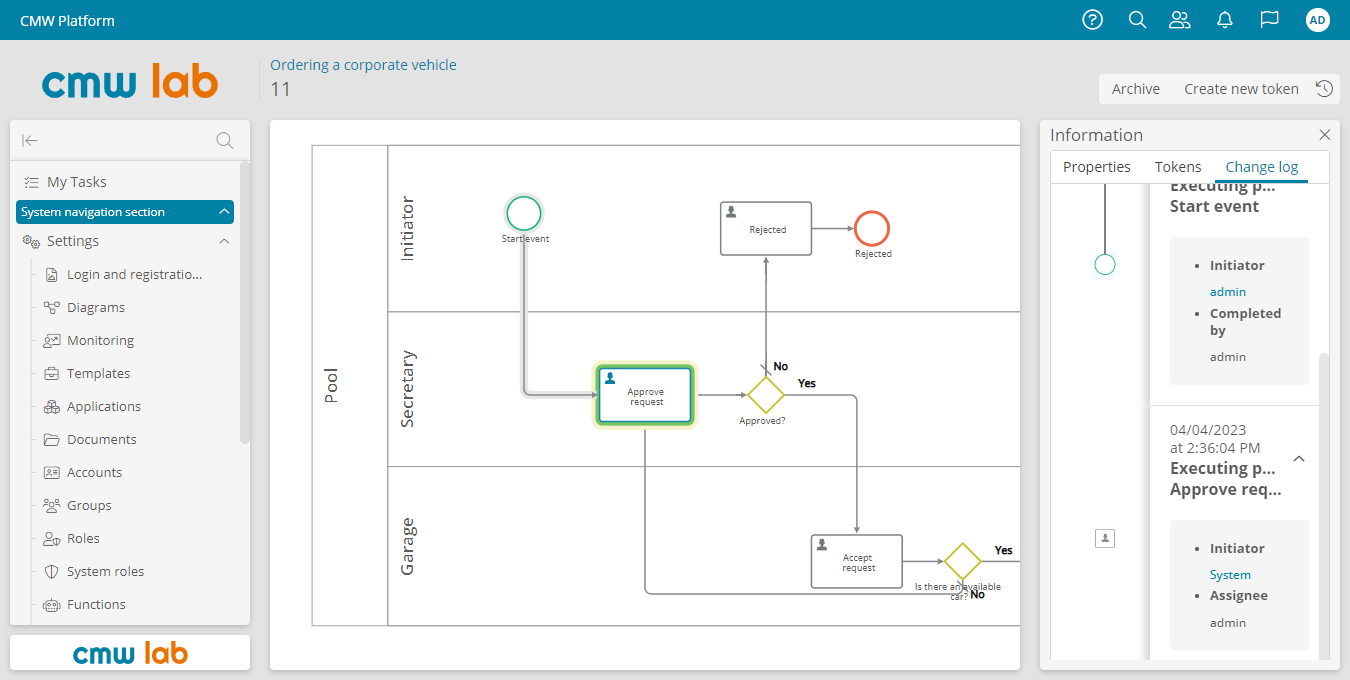
4. The process history view appears with the active diagram element highlighted in green.
Process History View
The process history view shows the process instance diagram and provides controls to inspect and manipulate the process flow.
The buttons above the diagram control the process instance:
- Stop process — remove all tokens from the process instance and set the process status to Canceled. This button appears if there is at least one token on the process diagram and no diagram element is selected.
- Archive — archive the process instance. Archived instances are not shown in the process instance list (unless it is configured to Show archived records.)
- Create new token — spawn a token on the selected diagram element. This button appears when you select a diagram element.
- Change log — show the change log tab.
The Information pane on the right of the process history view displays the following tabs:
Properties — information about the process instance:
- Status
- Active — there is at least one token on the process elements.
- Inactive — there are no tokens on the process elements.
- Completed — the process ended as expected and has no tokens.
- Canceled — the process has been stopped by removing all tokens.
- Created on — the process instance creation date and time.
- Creator — the account that created the process instance. Click the link to open the account details.
- Process template — process template name. Click the link to open the process diagram designer.
- Record — the ID of the record linked to the process instance. Click the link to open the record form.
- Record template — the linked record template name. Click the link to open the list of records.
- Version — the version number of the process diagram used to execute this process instance.
Tokens — a list of process elements with tokens. When you select an element, the Actions panel appears with the following buttons:
- Go to the user task form or subprocess diagram. You can also double-click a user task or subprocess on the diagram.
- Restart token on the element.
- Delete token from the element.
Change log — a list of events that occurred during the process execution. The Change log tab displays detailed information about all process tokens and steps:
- Token creation date and time
- Initiator account — the user who created the token
- Start date and time
- Completion date and time
- Assignees — the performers specified in the task properties
- Actual performer — the user who completed the step
- Event chain — click an icon next to an item in the Change log to view the chain of events for this item.
Viewing the history of a running business process instance
6. On the Change log tab in the Information pane, select the Approve request task.
7. The Approve request task is highlighted in yellow on the process diagram.
8. Click the ![]() icon next to the Approve request task to view its event chain.
icon next to the Approve request task to view its event chain.
9. Try to select other process elements to view their history.
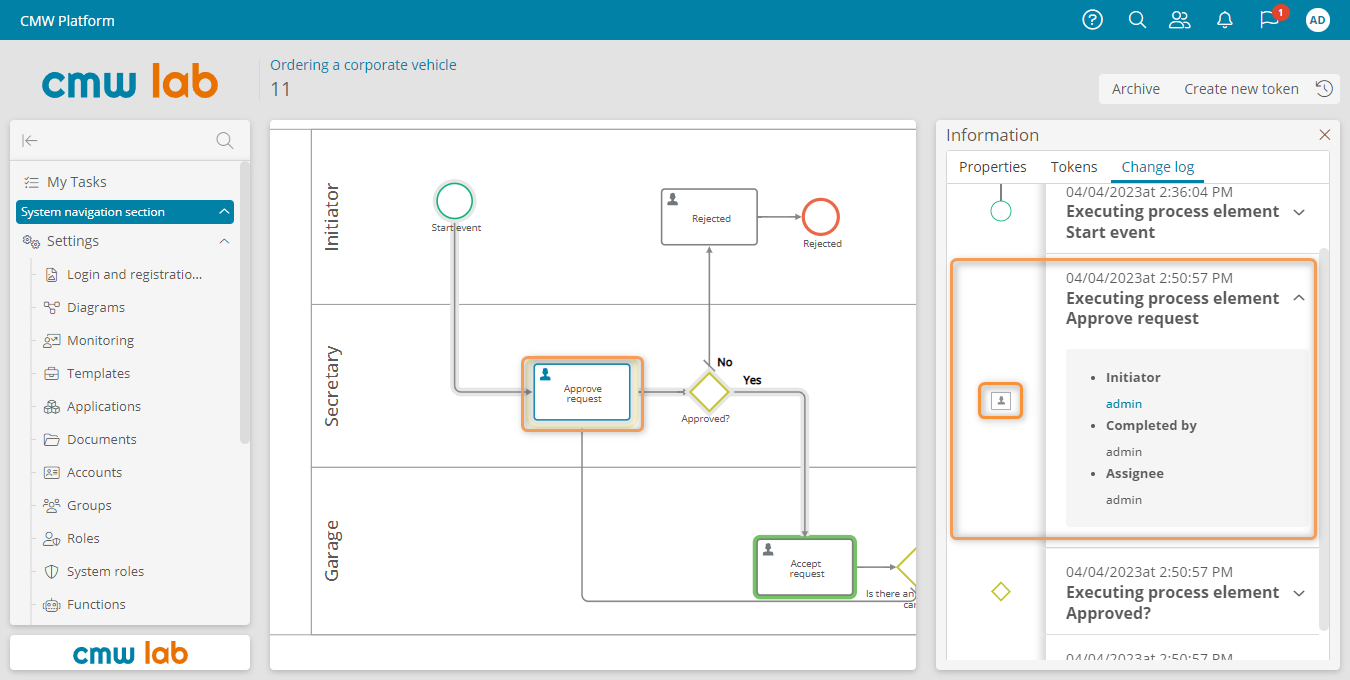
Viewing the change log of a running process instance
Configure a Page with a Pie Chart
Let's create a page with a chart displaying vehicle request percentage by month.
Pages
Pages in the CMW Platform are customizable dashboards to visualize and analyze the data. A page can contain charts, lists, metrics, and other widgets to visualize the business data.
Business Requirement
Before configuring and using the charts, generate relevant data: create and run several requests through the business process, filling in the Car delivery time with dates from different months.
1. Select Applications in the left navigation pane to open the application list.
2. Double-click the Vehicle management application to open its Administration page.
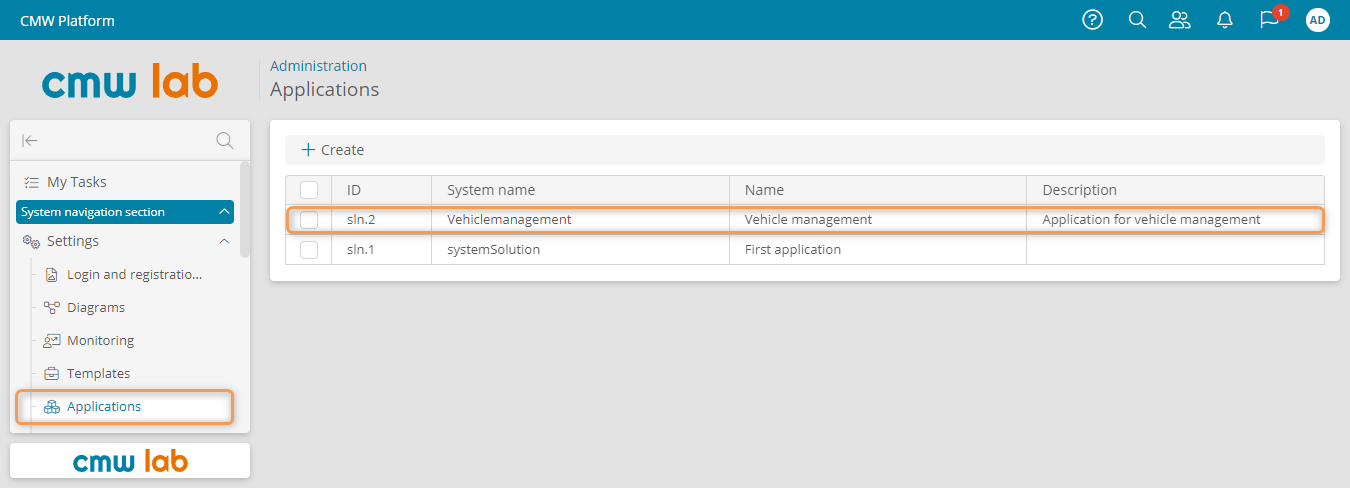
Navigating to the application Administration page
3. Go to the Navigation sections.
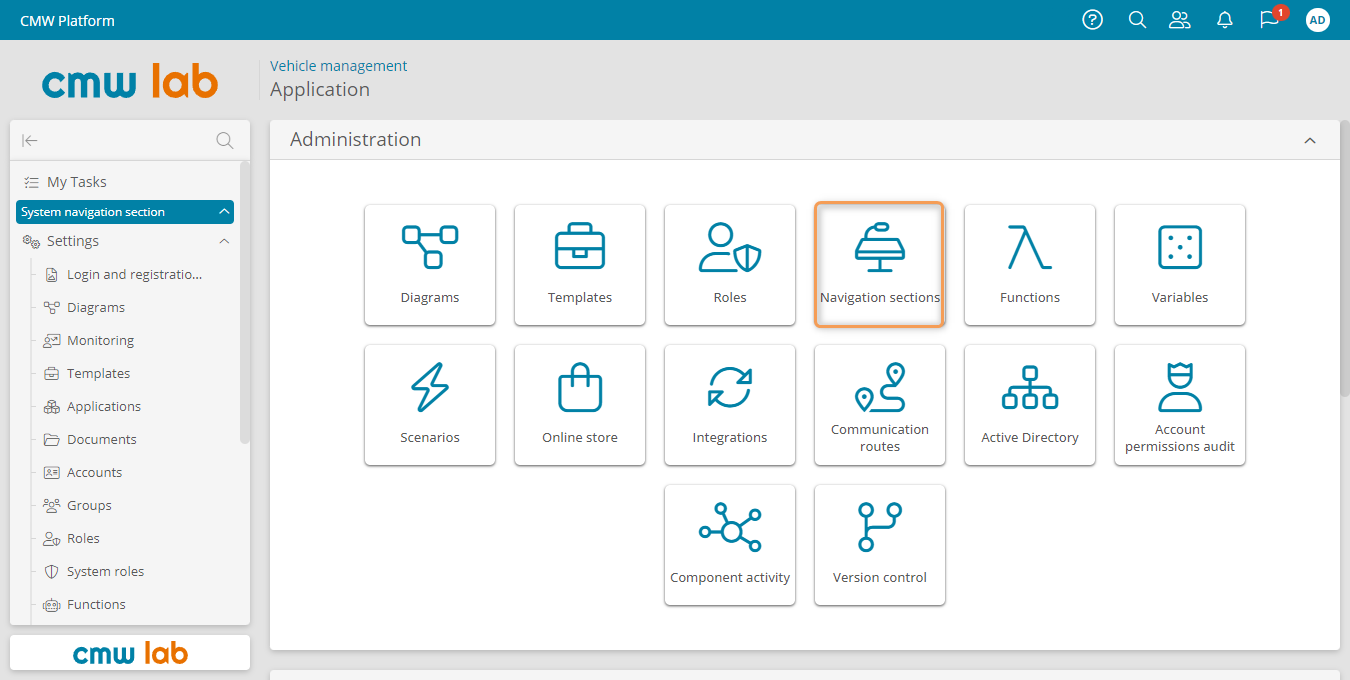
Going to the navigation section list of an application
4. In the navigation section list, click Create to create a new navigation section.
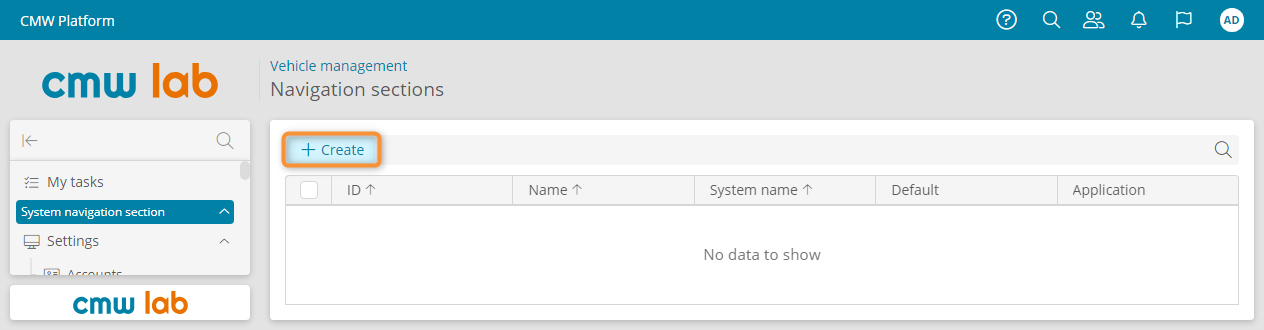
Creating a navigation section
5. The navigation section designer appears.
6. In the Navigation section properties panel, enter the Display name — Summary.
7. Save the Summary navigation section.
8. Refresh the page in your browser after saving the navigation section so that the next steps work correctly.
Configuring a navigation section
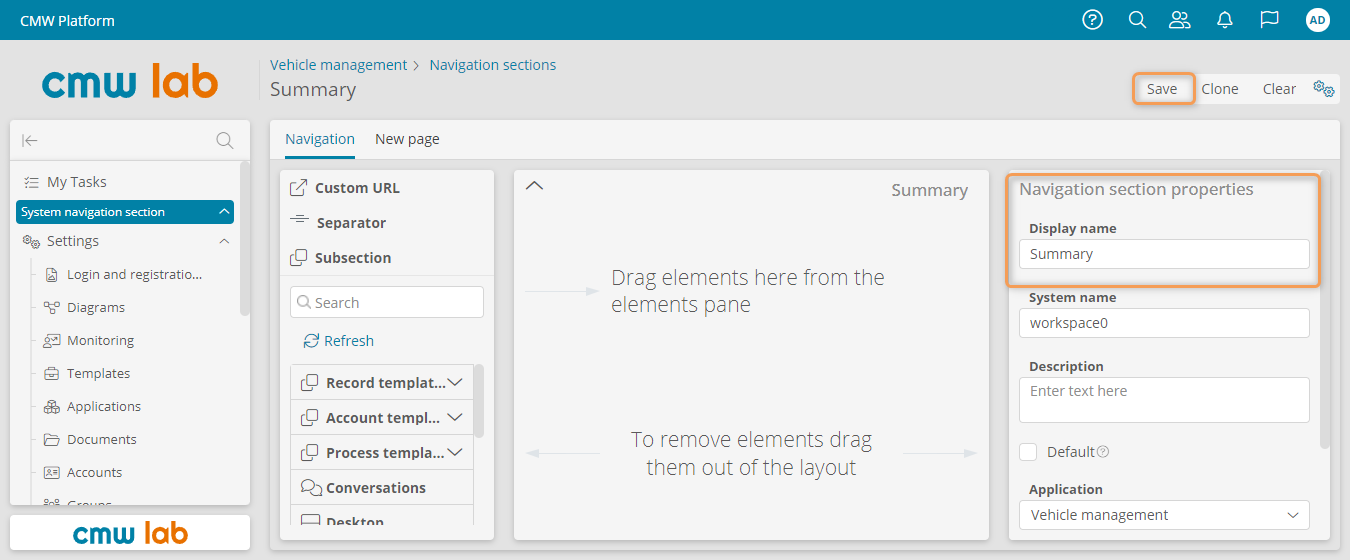
9. Go to the New page tab.
10. On the Page properties panel, specify the page name — Requests statistics.
11. Save the page.
12. Refresh the page in the browser after saving the page so that the next steps work correctly.
13. On the element pane, click Create chart next to the Charts item.
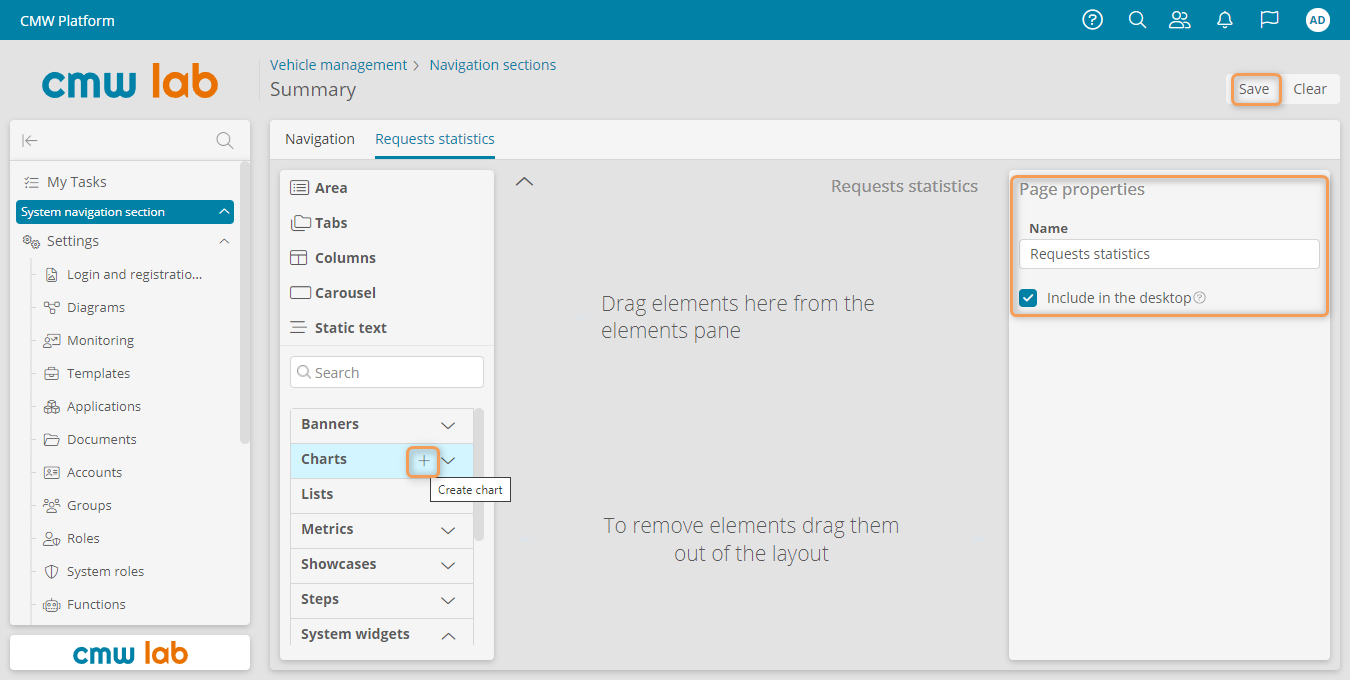
Creating a new page in the navigation section and adding a chart
14. Customize the chart using the Widget properties panel:
- Name — Requests by month.
- Display name — Requests by month.
- Type — Pie chart.
- Template — Vehicle requests: data source for the chart.
- Categories — Car delivery time: the date & time attribute used to group the records shown on the chart.
- Date filter
- Attribute — Car delivery time: the date & time attribute used to filter records shown on the chart.
- Periods — Adjacent months: the interval to group the records shown on the chart.
- Default period — Current month: the period to group the records shown in the chart by default.
15. Save the chart.
16. Click Refresh on the chart layout to view the resulting chart.
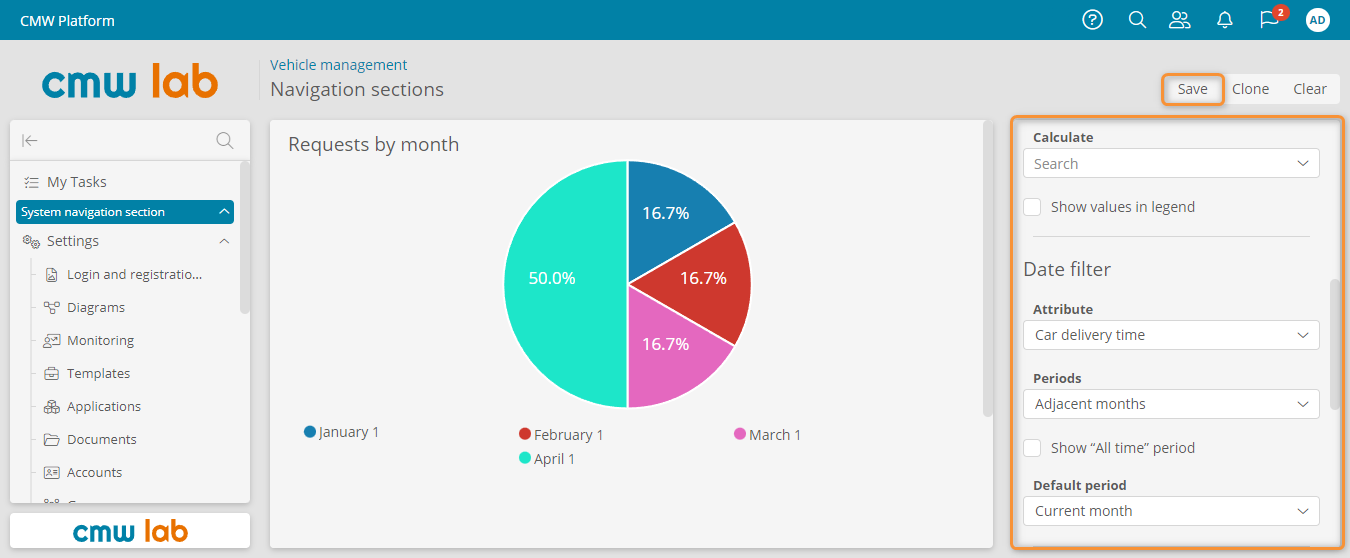
Configuring a pie chart
17. Click Back in your browser to return to the Requests statistics page.
18. Drag a new area to the page layout and rename it to Reports.
19. Drag the Requests by month chart from the element pane to the Reports area.
20. Save the page.
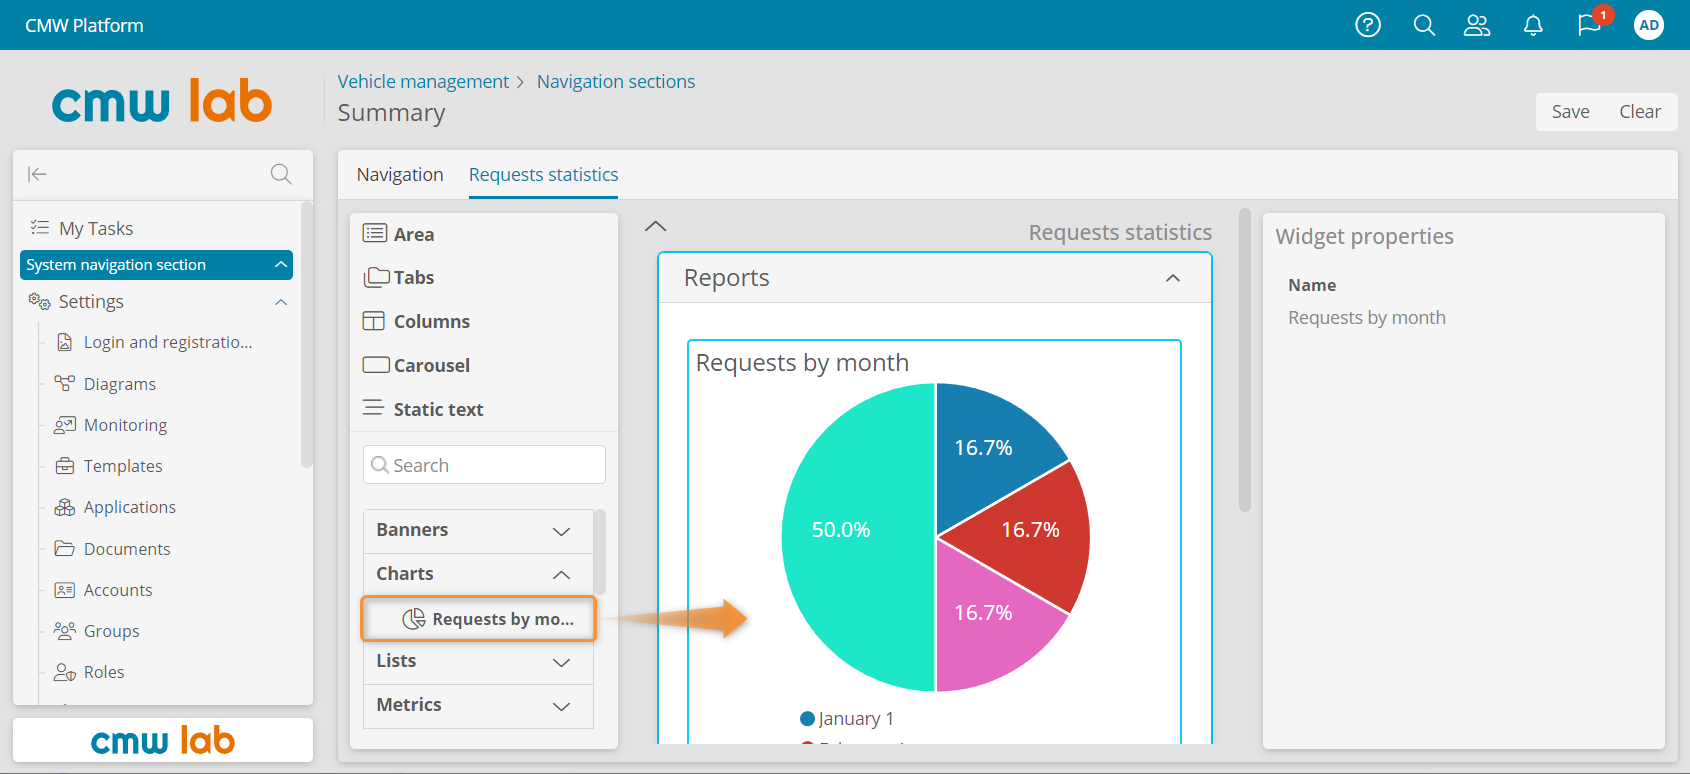
Adding a chart to the page
21. Go to the Navigation tab to return to the Summary navigation section.
22. Drag the Requests statistics page from the element pane to the navigation section layout.
23. Save the navigation section.
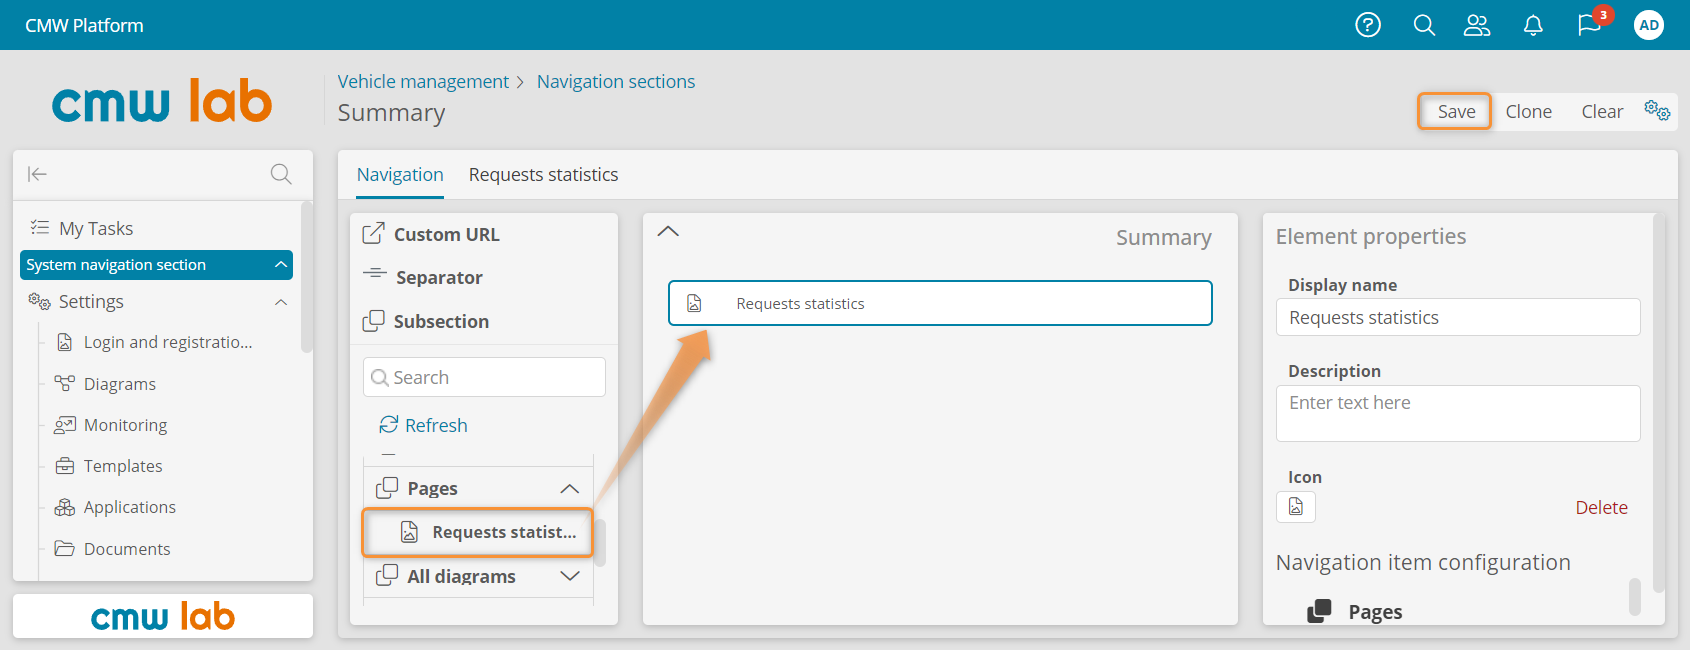
Adding a page to the navigation section
Results
You learned how to view the process execution history and create pages with charts.
You will use the Summary navigation later in Lesson 8 — Accounts.
Proceed to Lesson 5 — Data Structures to learn how to use the record attribute and create a reference data registry and a master data registry.