Lesson 10 — Working with Files
Table of Contents
Introduction
In this lesson, you will learn how to use the document attribute to attach files to a template record.
Estimated time to complete: 10 min
Prerequisite: you complete Lesson 9 — Document Generation
Note: This lesson is for the CMW Platform version 4.2.571.0. In other versions, the page and menu appearance may differ from the screenshots.
Configure Document Uploading
Business Requirement
The Driver needs to upload scanned receipts and other documents to the system after completing the trip.
Document Attribute
The document attribute stores the files uploaded by end-users.
You can configure the document attribute to allow uploading only specific file types or any files.
The document field on the form allows you to upload, download, delete, and preview the files.
Create Document Attribute
Let’s add a document attribute to the Costs record template.
1. In the Costs record template, go to the Attributes tab.
2. Create a new attribute:
- Name: Attachments
- Data type: Document
- Store multiple values: selected to allow attaching multiple files to a record
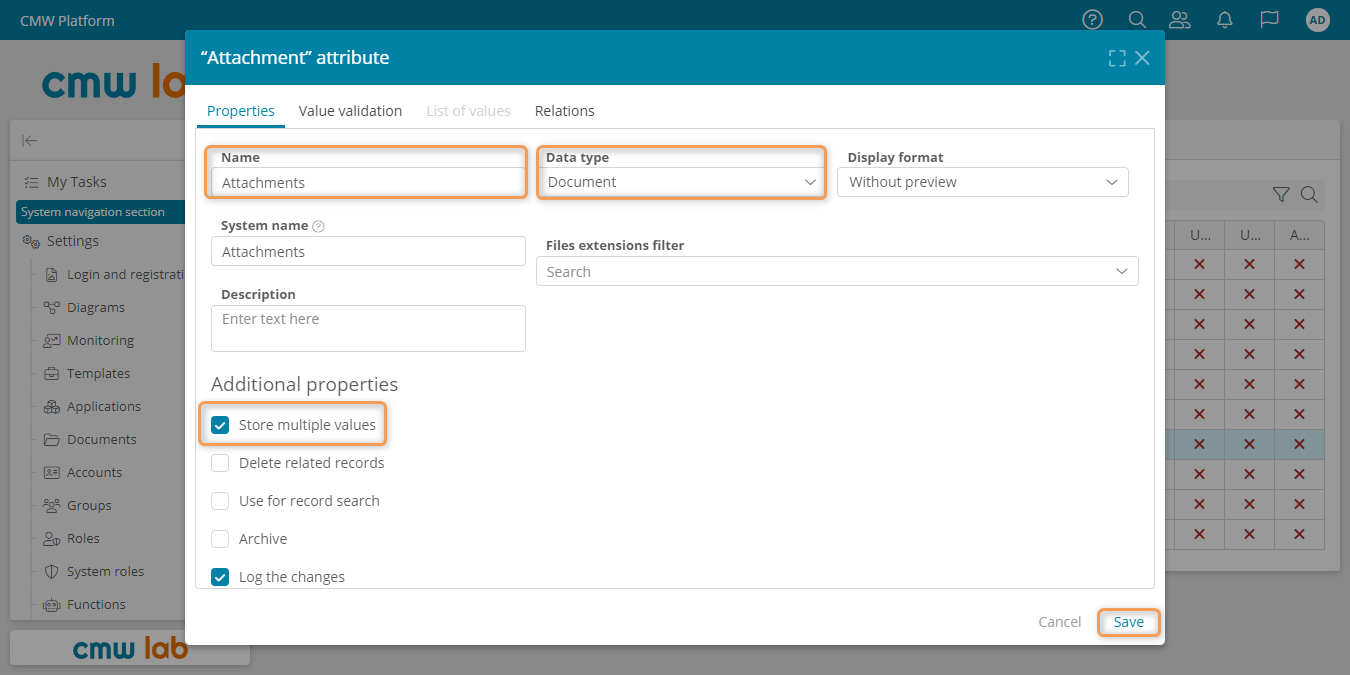
Creating a document attribute to store multiple files
Add Document Field to a Form
Let's add the Attachments attribute to the Costs table on the Complete the trip user task form.
1. In the Ordering a corporate vehicle process template, go to the Diagram tab and click Edit.
2. Select the Complete the trip user task and click Form in the element menu.
3. Expand the Vehicle requests and Costs templates in the element pane.
4. Drag the Attachments attribute to the Costs table.
5. Save the form.
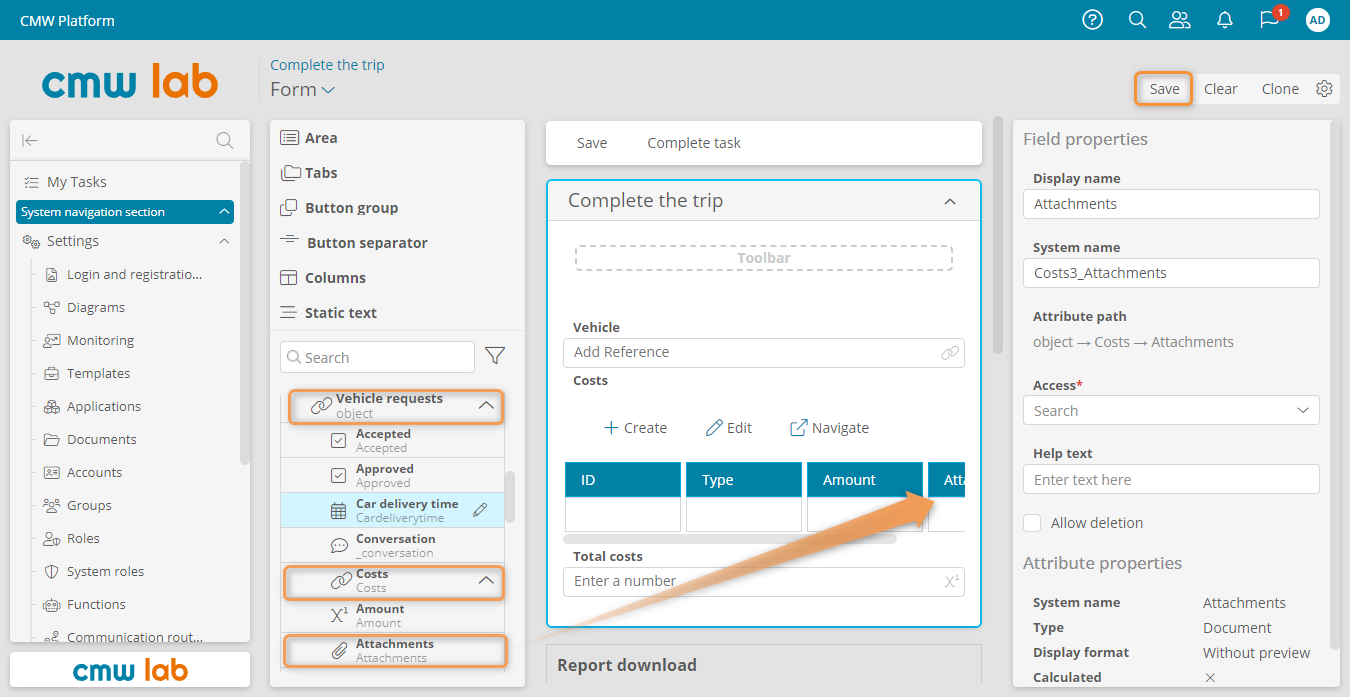
Adding a document attribute to a table on the task form
6. Go back to the process diagram and publish it.
Test Uploading and Downloading a Document for a Cost Entry
1. Submit a new vehicle request and go through the business process up to the Complete the trip user task.
Note
If you completed Lesson 8 — Accounts, the user tasks are assigned to different accounts.
To go through the business process, you can perform user tasks in one of the three ways:
- Log in several times with different accounts: Initiator, Secretary, Driver, Garage manager.
- Order a vehicle, open the running process instance diagram, and go through the tasks using the Navigate button in the Tokens panel.
- Set your account as the performer of all user tasks.
2. Open the Complete the trip user task and add a record to the Costs table.
3. Upload any file to the created record:
- Click the Attachments field in the cost record row.
- Click Add document.
4. Create another entry in the Costs table.
5. Upload any file for the second cost record.
6. Click Save.

Adding a file to the Attachments field
7. To test an attached file downloading, click the file name in the Costs table. Your browser should download the file.
Results
Congrats! You have learned how to upload and download the files in the CMW Platform.