Creating a Scenario
Table of Contents
Creating a Scenario from the Application Scenario List
- Open the scenario list in an application. See Viewing the Scenario List.
- Click Create.
- The New scenario window will be displayed.
- Configure the scenario properties.

New scenario properties windowподпись
- Click Save.
- The scenario designer will open.
- Configure the scenario, see Configuring a Scenario.
Creating a Scenario for a Business Process Diagram Element
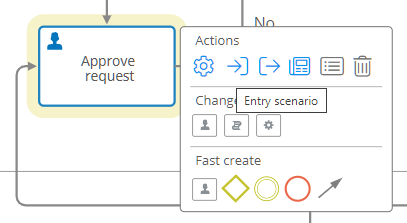
- Open a business process diagram.
- Select a diagram element.
- In the item menu, click Entry scenario
 or Exit scenario
 .
. - The diagram element entry or exit scenario will be automatically generated.
- The scenario designer will be displayed.
- Configure the scenario. See Configuring a Scenario.

Creating the scenarios for process diagram element entry and exit
Scenario Properties
- Name — a descriptive name of the script.
- System name — a unique scenario name, transliterated automatically from the scenario name.
- Description — an optional comment about the scenario's purpose.
- Execution context — the account on behalf of which the scenario will be executed:
- By system — the scenario will be executed with full rights of the System account, ignoring the role and permissions of the user who initiated the start event of the scenario. That is, the scenario will be able to perform any actions.
- By initiator — the scenario will be executed if the user who initiated the start event has sufficient rights. If the user has insufficient rights, the system will generate an error.
- Status — state of the scenario:
- Active — every time the start event triggers, the configured action sequence will be executed.
- Suspended — when the start event triggers, the configured action sequence will not be executed.
