Button Designer
Table of Contents
Opening the Button Designer
The button designer allows you to customize the appearance, behavior, and result of clicking the button.
- Open the template button list.
- Double-click a button row.
- The button designer will be displayed.
- Configure the button.
- Click Save.
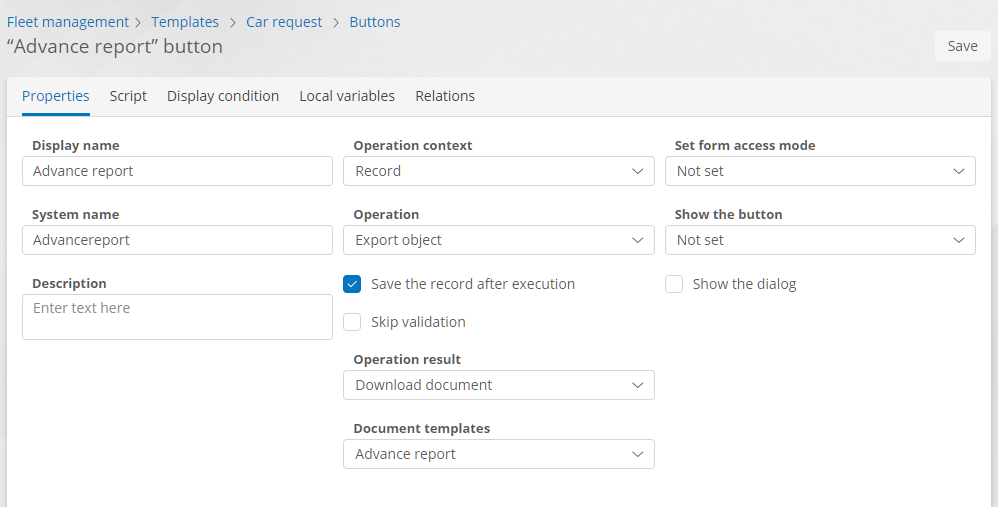
Button designer — Properties tab
Configuring a Button
The button designer has the following tabs to configure display options and the button click operation.
Configure the button and click Save.
Properties
On the Properties tab, configure the general button parameters.
- Display name — the button label. After placing the button within a button area (on a form or a table), you can change its display name on that button area, this change will not affect the name of the original button in the template.
- System name - a unique button name for use in scripts, expressions, and scenarios.
- Description — a relevant description of the button's purpose.
- Operation context — defines the available operations, the operation execution context, and the ability to use the button on the corresponding forms and tables.
- Record in a record, account, role, or organizational unit template.
- User task — an element of the process diagram.
- Process — process template or process instance.
- Account — a record in an account template.
- Diagram — a process diagram.
- Operation — available operation set depends on the selected operation context. The following operations are provided:
- C# Script — execute a C# script.
- Start process — launch a process instance from the current record or a new record.
- Stop process — stop the current process instance.
- Start process from linked template — launch the process from a record template linked to the current template.
- Export record — export the record using an export template.
- Export table — export a table in XLSX format.
- Archive — archive a record or process instance.
- Unarchive — unarchive a record or process instance.
- Create — create a record.
- Create related record — create a record in the template linked to the current template.
- Save — save the current record.
- Delete — delete a record or process instance.
- Reopen — assign In Progress status to the task.
- Complete task — complete the current process task.
- Defer — this operation will be implemented in future versions of the product.
- Accept — set the current account as the task assignee.
- Migrate — upgrade the process instance to the latest process diagram version.
- Generate new token — create a new token on the selected process instance diagram element.
- Link to a template — link the account to the selected account template.
- Unlink from the template — unlink the account from the selected account template.
- Trigger the “Button clicked” event — the button click will trigger the Button clicked event, for example, to run a script in the application.
- Edit — configure the process diagram.
- Save the record after execution — check this checkbox to save the current record upon the button click operation execution.
- Skip validation — if you check this checkbox, data validation won't be performed when entering and saving record data and validation errors won't be displayed.
- Operation result — select an action to perform upon the operation execution.
- Refresh data — reload the record data.
- Navigation — go to the object specified in the Navigate to field:
- Related record — go to a record linked with the process instance.
- Process instance — go to the process instance.
- Started process task — go to the current task of the process instance.
- Next task in list — go to the next task of the process instance.
- Previous page — go to the current table previous page.
- Diagram — go to the process instance diagram.
- Table — go to a table listing template records or process instances.
- Download document generated using an export template.
- Set form access mode
- Read — on the button click the form will become read-only.
- Edit — after clicking the button the user will be able to enter data into the form (subject to the appropriate permissions).
- No change — use the original form access mode.
- Show the button — use this dropdown together with the Set form access mode dropdown.
- In edit mode — the button will be displayed only in the form data entry mode.
- In read mode — the button will be displayed only in the form read-only mode.
- Always — the button will be displayed in data entry and read-only modes.
- Show the dialog — if you check this checkbox, clicking the button will open the operation confirmation dialogue you configure.
- Configure the dialog — go to the operation confirmation form designer. The element panel in this designer shows the operation local variables that you can drag and drop on the dialogue.
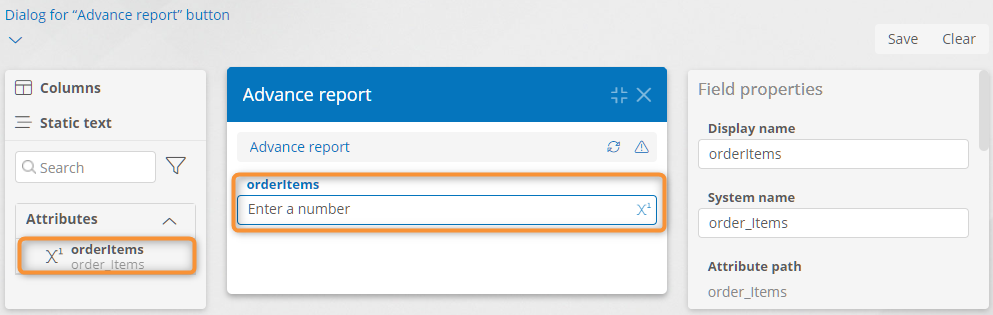
Operation dialogue designer with a local variable
Script
On the Script tab, you can enter a C# script to execute on the button click.
To generate a C# script template, click Generate C# template.
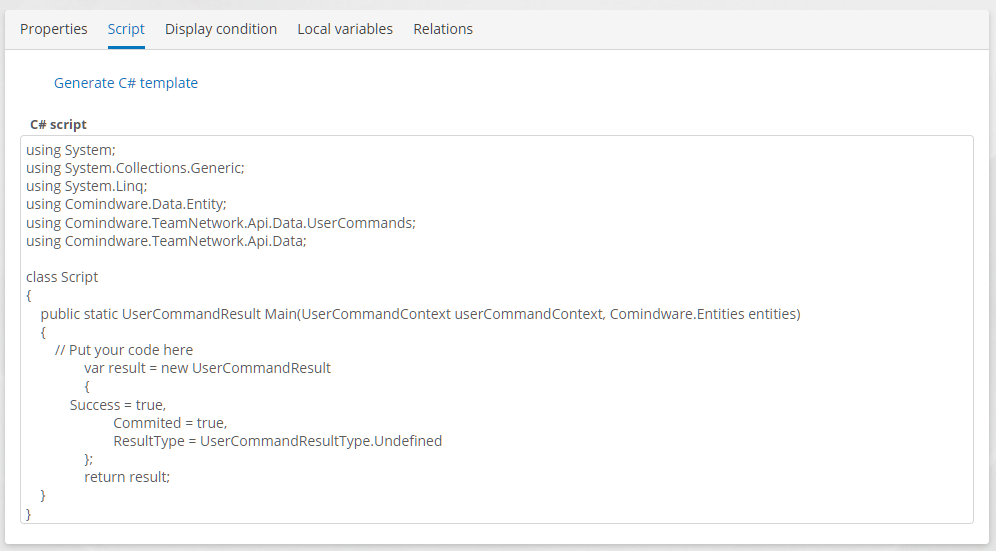
Button designer — Script tab with a C# script template
Display Condition
On the Display condition tab, you can configure a formula or N3 expression. The button will be displayed if the formula or N3 expression returns true. Otherwise, the button will be hidden.

Button Designer — Display condition tab with a formula
Local Variables
On the Local variables tab, you can create variables to use in a C# script or scenario executed on the button click.
Local variables are essentially the attributes.
For each variable, you can set:
- Display name — a relevant variable name.
- Data type — variables have the same types as attributes.
- Display format — variables have the same display formats as attributes.
- System name — a unique variable name for use in scripts, expressions, and scenarios.
- Description — a relevant variable's purpose description.
- Template — can be set for the following variable types: Record, Account, Role, and Organizational Unitattribute_organizational_unit.md.
- Store multiple values — you can check this checkbox for the following variable types: File (see attribute types Document, Image), Record, Account, Role, and Organizational Unit.

Button Designer - Local Variables Tab
Relations
The Relations tab displays the list of all application objects and resources associated with the button.
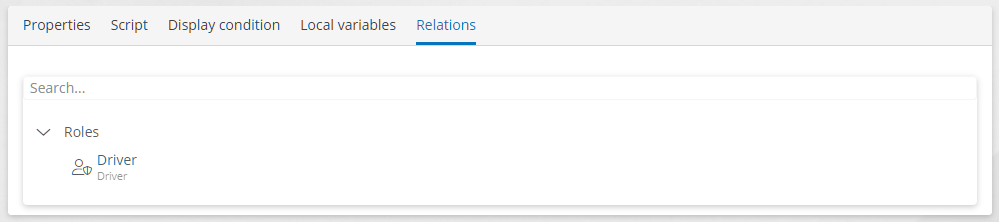
Button designer — Relations tab