Adding a Wide/Small Logo
Adding a wide logo
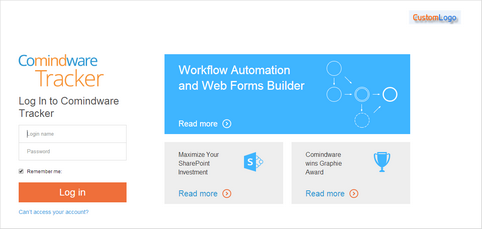
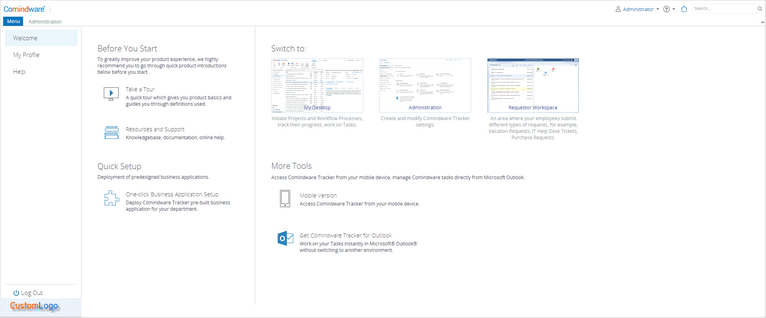
The wide logo is displayed:
- on the login page in the top right corner

Custom Logo is displayed on the login page
- in the Menu tab in the bottom left corner

Custom Logo is displayed in main menu
To add a wide logo:
1. Go to «Administration» > «Custom Logo».
2. Click the «Upload» button next to «Wide logo» and select an image or logo for your organization. The preferred size of the wide logo is 150x35 pixels and the logo file must be in .gif, .jpg, .jpeg, or .png format.
3. Type the logo URL and hyperlink tooltip into the corresponding text boxes. When users click the logo they are taken to the page you designate in the «Logo URL» box. Text from the «Hyperlink tooltip» box will be visible when the user hovers over your logo.
4. Make sure the «Enable» check box is selected.
5. Click the «Save» button in the Ribbon.
To reset to default, click the «Reset» button or clear the appropriate text box, and click «Save» in the Ribbon.
Adding a small logo
A small logo is displayed in the program header to the right of the search box.
![]()
Small Logo is displayed in the program header
To add a small logo:
1. Go to «Administration» > «Custom Logo».
2. Click the «Upload» button next to «Small logo» and select an image or logo for your organization. The preferred size of the small logo is 24x24 pixels and the logo file must be in .gif, .jpg, .jpeg, or .png format.
3. Make sure the «Enable» check box is selected.
4. Click the «Save» button in the Ribbon.
To reset to default, click the «Reset» button and then click «Save» in the Ribbon.
