Working with Automated Scheduled Reports
To create a scheduled report:
1. Select a list in the Navigation pane and go to the «List» tab.
2. Click the «Schedule Report Delivery» button in the Ribbon.
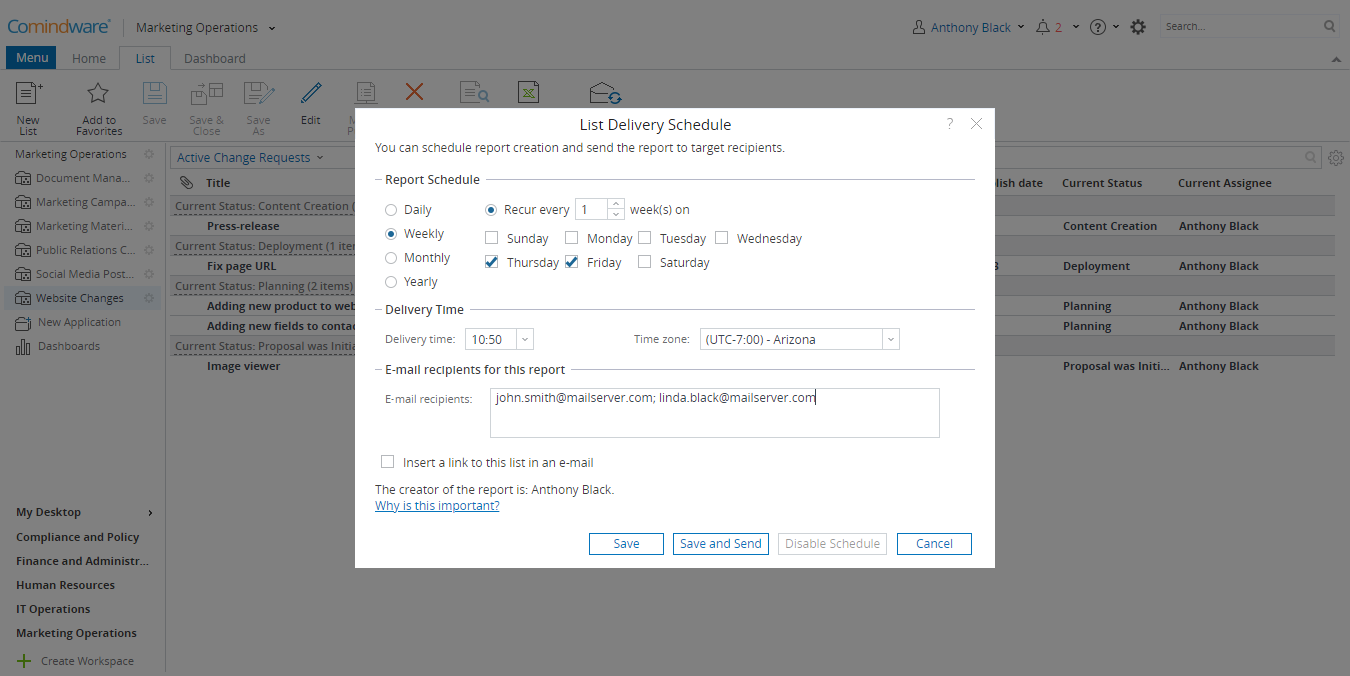
3. Configure list delivery schedule:
- Report Schedule — specify how often to send the report (Daily, Weekly, Monthly, Yearly), and then select options for the frequency;
- Delivery Time — specify the delivery time of the report and the time zone;
- E-mail recipients for this report — specify the e-mail addresses of users whom you want to receive this report. Use semicolons ( ; ) to separate e-mail addresses;
- Insert a link to this list in an email — select this check box if you want recepients to receive a link to the list with their email.
4. When finished, click «Save».
Scheduling a report
To change an existing report schedule:
1. Select a list scheduled to be sent as a report and go to the «List» tab.
2. Click the «Edit Report Delivery Schedule» button in the Ribbon.
3. Modify send report settings: send schedule, send time, e-mail recipients.
4. When finished, click «Save».
To cancel send report schedule:
1. Select a list scheduled to be sent as a report and go to the «List» tab.
2. Click the «Edit Report Delivery Schedule» button in the Ribbon.
3. Click the «Disable Schedule» button.